01 Overview — Three Core Problems
When creating skeletons in Houdini, a large part of the work is repetitive. Each joint must be positioned manually, named according to convention, mirrored for symmetry, and connected into a hierarchy. This process repeats for every new model and quickly becomes a bottleneck.
To address this, I developed rig_bones_generator — a procedural skeleton generation system for Houdini. The goal is to reduce iteration cost and allow reusable skeleton presets for anatomically similar assets: humanoid characters, vehicles with symmetric structure, or any asset type requiring a consistent skeletal layout.
The system focuses on three core problems: automatic joint naming based on game industry conventions, working with different topology types (clean edge loops vs broken remeshed geometry), and preparing skeletons for downstream workflows — Apex rigging and animation export.
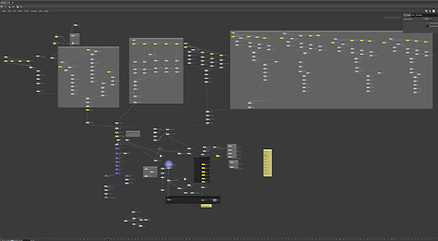
02 Skeleton Creation Workflow
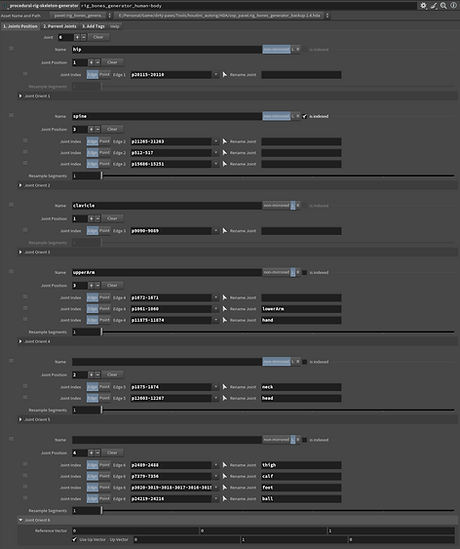
The first stage covers joint positioning and naming. Two selection modes handle different topology conditions, and naming is fully automated once the bone name and options are set.
Joint Placement — Edge vs Point Selection
Joint Naming — Convention & Mirroring
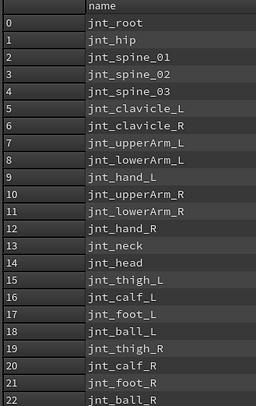
Joint naming is handled automatically. The naming format follows a standard game industry structure:
| COMPONENT | EXAMPLE | NOTES |
|---|---|---|
| Joint type | bone_ | Prefix identifying the element as a rig bone |
| Body region | arm_ | User-defined name — set once per bone group |
| Side | l_ / r_ | Auto-applied when symmetry mode is enabled |
| Index | _01 / _02 | Auto-generated for chains (spine, tail, fingers) |
For symmetrical bones, selecting left or right automatically applies side suffixes and generates mirrored joints in a single operation. For chains such as spine or tails, indexed naming generates numbered joints automatically — no manual renaming required.
Additional joints can be inserted by defining start and end joints and applying resampling — creating intermediate joints for finer rotational control. Joint orientation can be adjusted when needed, though for models aligned to the +Z axis default settings are usually sufficient.
03 Hierarchy & Parenting
Once joint positions and names are defined, the skeleton hierarchy is created using the parenting workflow. Parent and child joints are assigned in the parent joint tab.
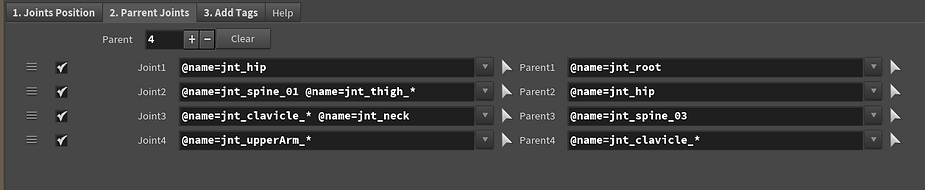
Wildcard patterns can be used in joint names to speed up parenting. This allows entire mirrored joint groups to be connected to a parent in a single operation — avoiding repetitive manual connections for left/right symmetrical limbs. At this stage, the skeleton is already suitable for export to a game engine.
| TECHNIQUE | EXAMPLE PATTERN | RESULT |
|---|---|---|
| Wildcard side match | bone_arm_* | Matches bone_arm_l_01, bone_arm_r_01, all arm joints |
| Index range | bone_spine_0* | Matches all numbered spine segments |
| Exact name | bone_root | Single joint — root parenting |
04 Apex Integration
For more advanced rigs, the skeleton can be extended using Apex — Houdini's procedural rig-graph system. Apex operates on top of an existing skeleton and uses tags to build rig logic without modifying the underlying joint hierarchy.
The rig_bones_generator node outputs three data streams that connect directly to a standard Apex setup:
| OUTPUT | TYPE | APEX ROLE |
|---|---|---|
| Skeleton | Joint hierarchy | Base structure — joint positions, orientations, hierarchy |
| Guides | Tagged control data | Apex input — builds IK/FK controls, constraints, rig logic |
| Weights | Bone influence weights | Skinning data for mesh deformation and FBX export |
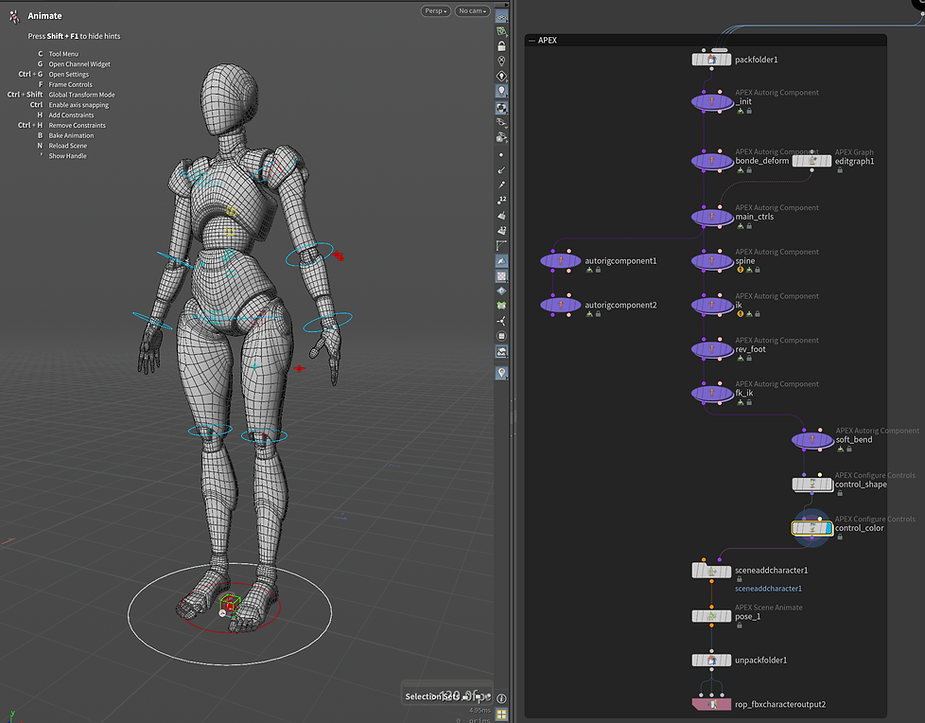
All three outputs connect to a standard Apex setup, allowing construction of modular IK/FK rigs without modifying the underlying skeleton. The tag-based approach means rig logic is defined in the Apex graph — the skeleton remains clean and reusable across rigs.
05 FBX Export & Animation Retargeting
For export, the ROP FBX Character Output node is used. Connecting the Skeleton and Weights outputs is sufficient to export a game-ready FBX file — no additional configuration required for standard engines.
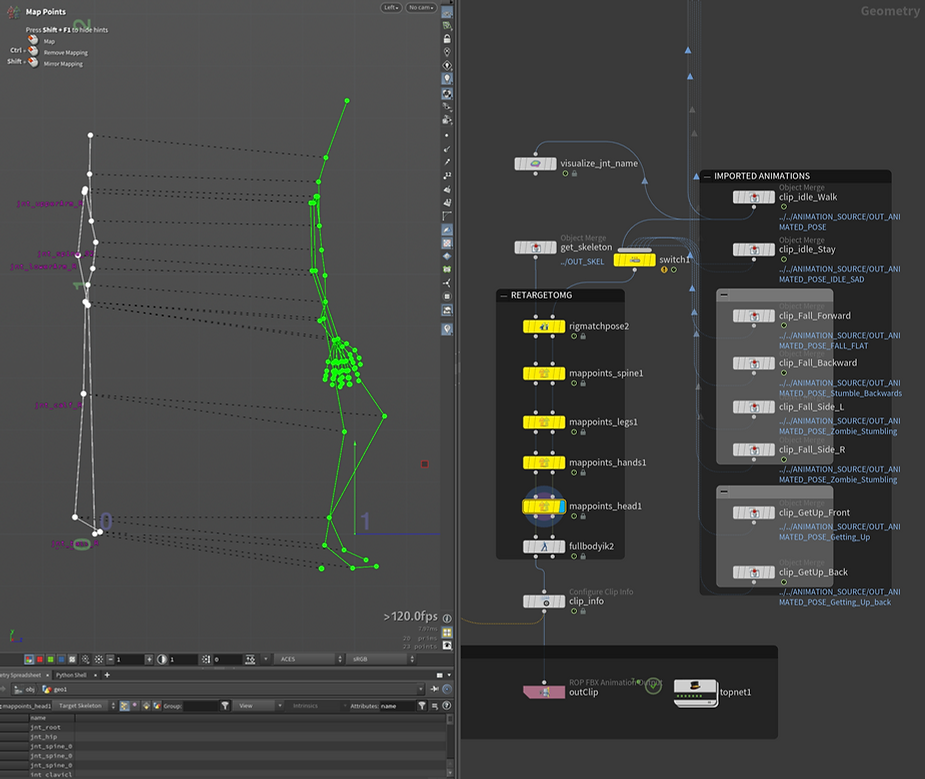
Animation Retargeting
Retargeting is handled using Houdini's MapPoints workflow. As long as bone names remain consistent — which the rig_bones_generator enforces by design — animations from external sources such as Mixamo can be mapped and reused without manual remapping.
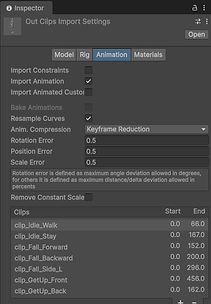
Using a TOP network, multiple animation clips can be baked and exported into a single FBX file. This allows batch processing and keeps all required animations in one asset. Testing in Unity confirms that clip names and frame ranges are preserved correctly.
| WORKFLOW | NODE | OUTPUT |
|---|---|---|
| Single FBX export | ROP FBX Character Output | One FBX: mesh + skeleton + weights |
| Animation retargeting | MapPoints + external source | Remapped animation on rig_bones_generator skeleton |
| Batch clip export | TOP Network | Single FBX: all clips, correct names and frame ranges |
06 Preset-Based Workflow
Once configured, the rig_bones_generator node becomes a reusable preset. It can be duplicated across different models where only joint positions need to be reassigned. Naming, hierarchy, mirroring, and connections are handled automatically by the existing configuration.
A single preset can be created for human anatomy, then reused across all humanoid characters in a production. The same approach applies to any asset type requiring consistent skeletal structure — vehicles, creatures, mechanical rigs. The tool is anatomy-agnostic: the preset defines the convention, the geometry defines the positions.
What the Preset Preserves Across Assets
| PRESERVED IN PRESET | REASSIGNED PER ASSET |
|---|---|
| Bone names and naming convention | Joint world positions |
| Side suffixes and mirroring rules | Edge / point selection inputs |
| Chain indexing (spine, tail, fingers) | — |
| Hierarchy and parent assignments | — |
| Apex output connections | — |
| Export configuration | — |
- [01]
- [02]
-
[03]
FORUM — Apex Rigging Workflow Discussion. SideFX Forums, 2024.
sidefx.com/forum — Apex Workflow Thread - [04]